Wednesday, April 26, 2017

Finished!

I managed to finish my stablemate saddle today! Here are a few pictures from the last few days of work:

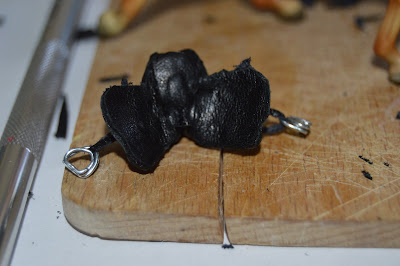
I made my own stirrups using this tutorial. And added the stirrup leathers. They were such a pain get into place! I even managed to poke a hole in my finger with the non-pointy end of a needle... Yeah, that part caused some irritation and bad words. Poor boyfriend had to put up with me during this step...


I then attached the seat which is a bit too bulky and big for the rest of the saddle.


I then attached the jockeys which just adds to the impression that the seat is too big and bulky.


I then lined the underside with some thin leather to make it look a lot neater.


I then made and attach the panels to the underside and they actually made the saddle look a tiny bit better in photos, but it's still too bulky and big. 


The girth is just a long strip of leather that is glued under the offside of the saddle and supposed to be sticky waxed under the showside flap but in the pictures I cheated and just tucked it under 😊


It's far from perfect but it was a fun project and I have learnt a great deal that I can do differently next time. This was my unofficial project for NMTM but I'm glad I got it finished.

Tuesday, April 25, 2017

Another IMEHA Champion

This month another one of my models managed to reach IMEHA champion status.


Lost All Hope is only competing in the headshots class and she hasn't won any big titles but she consistently place in her class and that has earned her enough points to earn the champion title.

She joins Dun To Perfection and Athame who both earned their titles earlier this year. Lost All Hope is a favourite of mine so it's really nice to see her do so good 😊

Wednesday, April 19, 2017

Mini Khemo

 Another little addition to the collection arrived yesterday.


This is Sarah Rose mini Khemosabi. I love the full size version but will probably never be able to afford one so I was over the moon when Sarah released him in a mini version (even though I'm not exactly a mini collector).


 He is super detailed and absolutely beautiful!


I love his face!


I'm not sure what to make of him yet. I'm thinking chestnut sabino or maybe black rabicano. Maybe even making him a mare. Oh, the possibilities!


Anyway, until I can figure out what he wants to be, he'll keep the rest of my naked collection company.


I really need to get started on these guys! They are multiplying!

Monday, April 17, 2017

National Model Tack Month - Success!

Yesterday I managed to finish my National Model Tack Month project but it was too late and dark to take any pictures so I did it today!

The set was built on my Lady Phase model but I wanted to try it out on some of my other stockhorses as well. I don't own a whole lot of stockhorse models so I chose to just use two of my favourites.

The pad is just temporary, borrowed from a Breyer western saddle. I will make a proper pad to go with this set but I don't have the materials so that will have to wait.

Chocolate, Breyer Tr. Impress Me Shannon OF
It might not be perfect but for being my first try I'm quite happy with it.


There are quite a few things that I would do differently if I were to do another one. But it was a great learning experience and I enjoyed the process even though I hit a few snags here and there.


I also think that Chocolate looks very good in this set. The bride fit him even better than it fit Illusions Fade Away (Breyer Tr. Treasured Moves OF on the Lady Phase mold) who I fitted it to. But that didn't bother me at all as Chocolate is one of my absolute favourite stockhorses in my collection and I'd love to show him in performance.


I might bring this set to a liveshow in May. I'm not expecting it to do too well but it would be nice to get out and start showing some performance as well.


I also tried it on TO Rascal Knox (Breyer Tr. Zippo Pine Bar OF) and it looked okay on him as well, although I'm not too keen on the natural colour with his rather bright, orange-y chestnut colour. I think he'd do better in a darker colour.


Since I still have almost half a month left I'll see if I'd be able to finish my stablemate saddle and maybe a matching bridle for it as well 😊

Sunday, April 16, 2017

NMTM Day 16

Today I had a lot of time to work on my NMTM Project.

I got the seat covered in suede and the jockeys glued on after a few moments of fitting and a tiny bit of trimming to make them fit well.


 I also glued on the cantle piece, after making a new one. I managed to mistake the cantle piece for the cantle support piece so I glued it in the wrong place and trimmed it so it was not possible to use the old piece. But when I got it all right I think it looks quite good.


 Next up was adding all the conchos. And there the next problem started. While attaching them on the saddle I managed to break of all 6 of the pins... No kidding, ALL SIX of them! So I had to resort to plan B.


Plan B was making holes for the tiny bit of pins that was left and gluing them in place. It worked quite well.


Here I have added 4 out of 6 conchos.


When all the conchos were in place I started adding the silver decorations.


Slowly but surely the plain saddle turned into a simple yet decorated saddle.


When adding the upper skirt I had to split it to make it fit properly. Unfortunately I wasn't thinking and I didn't split it in the middle... I'll do that next time. Anyway I covered the split with a silver piece from the framing of the silver decorations. And I think it looks okay.


I did have more silver plates that I could've added but I liked the current look where it is decorated yet not over the top.


Other side.


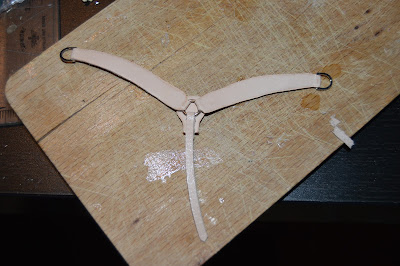
 So when I was happy with the saddle and considered it done. I started working on the breastcollar. It came together quite nicely and quicker than I thought.


It wasn't a very hard piece of tack to make but it was quite fun to see it come together so quickly and without a lot of fuss.


Then I started the bridle which also came together quite smoothly and quick. 


I then realized that I had managed to reach my goal. My NMTM project is officially finished 😄. And I have almost half a month left! So next up will be the stablemate saddle.


Better pictures of the finished piece will come in the next few days 😊

NMTM Day 8 and 9

I managed to make some small progress on my NMTM project last weekend before I started working.

Day 8
I managed to finish one of the cinches (besides the liner) and I almost managed to finish the other one.


I wrapped a suitable model, in this case I chose Illusions Fade Away, with cling film in order to protect her when I was putting the saddle together.

Illusions Fade Away, Breyer Tr. Treasured Moves OF
Day 9
I glued the second cinch and tried it on my model. This is what it looked like on the model:


I added the connector and the liners to the cinches and could finally call them finished.


 The other side of the cinches:


How it looked on the model when it was all done.


Hopefully I'll be able to finish the saddle in the next few days 😊


Wednesday, April 5, 2017

NMTM Day 3,4 and 5

I didn't have time to blog about my progress the last few days (and they weren't that big) so I decided to put the last days work into one post.

Day 3
I worked late and had a few things to take care of in the morning before work so not much time to work on anything modelhorse related. I still managed to get all of the pieces cut out and organized in plastic bags so nothing will get lost.


Day 4
I did manage to do some more work and actually got the shoulder completely covered. I didn't have time to trim the edges so it looks a bit rough in my pictures but overall I think I've done quite well.


Day 5
Today is my day of work (as I work this weekend) and I've gotten further than I thought I would. I've managed to make holes in the billets. I used my exacto knife to make a very small hole and then I used a pin to make it larger and nicely round.


I think it looks quite good 😀


I added the billet straps,


and the reinforcement pieces on the backside of the lower skirt.


I added the D rings for the breastcollar and the billets to the lower skirt and I'm quite excited about the look of it, already!


I also managed to finish the stirrups, and attach them to the fenders.


Photo below is just all the pieces put on top of each other to get a view of how it looked. I love it so far and can't wait to put all of the pieces together and decorate it! 😃